If you’ve heard it once, you’ve heard it a dozen times. “An image is worth a thousand words.”
Sometimes, old adages lose their relevance as time goes on, this one is likely here to stay.
Whether in print media, on TV, or on a website, images are of the utmost importance.
People want to see images. They want to share visual content. They both relate to, and engage with, images and videos than words on a page.
In fact, according to Twitter research, tweets with images and videos are far more likely to be retweeted.

That’s not to mention the benefits of showing up in Google image searches with your products, or other targeted imagery.
So, it should come as no surprise when we say that “image SEO” is most definitely a thing.
However, image optimization often gets short-changed.
Ask the average marketer what they do for image SEO and you’re likely to get a sheepish smile and “I wrote an alt-description.”
Better than nothing Mr. Marketer, but Image SEO is far more than that.
Want to know how to optimize your images so that Google redirects image search traffic to your site and people start sharing your content?
Let’s dive in.
First Things First: Picking Images
This probably goes without saying, but first and foremost you need to pick smart images.
Alt text, schema markup, and image compression can’t make an irrelevant image useful for consumers.
When you use a high-quality and relevant images, you’re more likely to attract attention and that can mean higher conversion rates.
Take Dell, for example. They tested two versions of the following expert consultation page…
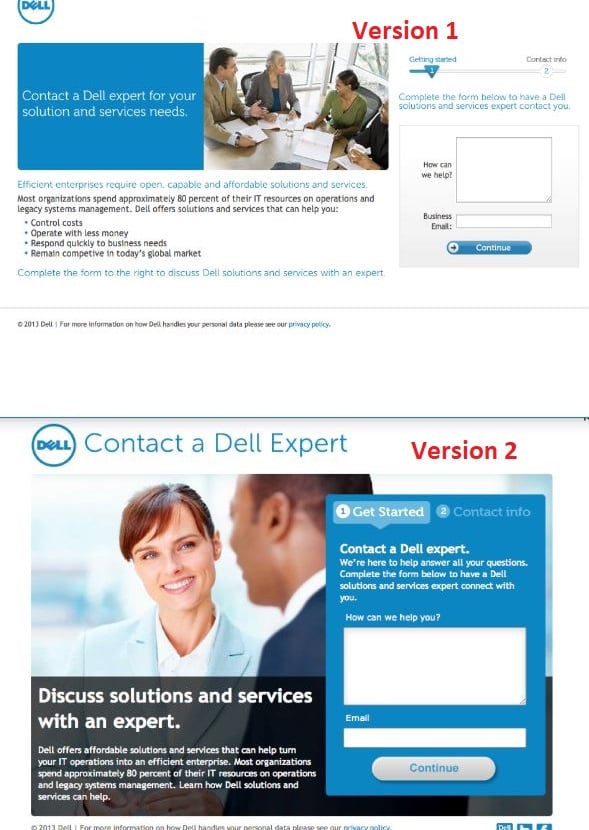
Turns out, the second version (with a bigger image) improved their conversion rate by 30%. Impressive, right?
Now, choosing the best image for your page isn’t rocket science. All you have to do is check off these three boxes:
Stick to your brand
Any image on your page isn’t there just for serving its purpose as content or looking pretty. Visual elements like images or infographics can also contribute to brand perception.
Take a look at Dell’s pages above again. Don’t they both come across as pretty serious and very competent? The images and other design elements they used clearly broadcast that perception.
If you pick an image that clashes with your brand image, it can jeopardize your entire brand presence.
Stick to your brand guidelines while choosing imagery to use on your marketing materials and website.
Use your own imagery
For many business owners, stock photography is a beautiful thing.
No need to hire your own photographer or buy the equipment. Just pay a few bucks for some relevant stock photos and call it a day.
Sounds like a good deal, right?
Well, it is and it isn’t. The main issue you’ll need to contend with is that everyone else is thinking the same thing.
Having the same images as your competitors probably isn’t the best way to optimize them for search engine discovery and prominence.
Duplicate images are even worse for e-commerce marketers. And many of them are guilty of using product images supplied by the manufacturer.
The last thing you want is someone skipping by your business simply because you didn’t take the time to find interesting imagery.
Go for original images whenever possible. Get photos that are shot from the right angles, look professional, and most importantly, subtly promote your brand.
Now I know that this isn’t always going to be possible. So you can always engage in some light photo editing (when permitted by image licenses), or at least go past the first few pages of stock results to find something that isn’t used as often.
Use proper licensing and attribution
Speaking of licensing, if you end up using stock photos of any kind, make sure you employ proper attribution.
If your image gets taken down, or you face legal action for improper use, needless to say that any optimizations you might have made are rendered useless.
Simply put, attribution is a way of acknowledging the original photographer’s work. However, attributing stock images also protects you from lawsuits. Using someone’s work without proper permission is a violation of the original artist’s rights.
Even if the image has a creative commons license, you should still provide attribution. There are loopholes that unscrupulous legal firms can use to level charges against you for their use.
To cover your bases, be sure to include a link to the image source, and state said source underneath the image.
For a more in-depth read, Pixsy has you covered with this guide to image attribution.
Optimizing Image Files
Once you get your hands on the perfect image, you want to optimize the file for best site performance and UX. Basically, you will be looking at three things:
1. Choose the best file format
Page load times affect conversions and are a ranking factor in Google’s algorithm.
Even a seemingly small difference, like ½ a second, can measurably lower conversion rates. It’s been estimated that Amazon would lose over $1.6 billion if their pages took 1 extra second to load.
While your losses may not be comparable, nobody wants to lose conversions for no good reason.
Believe it or not, images on average take up to 68% of the total page weight. And not all image formats are the same.
Depending on image format, the size of your image will vary greatly. Pick the wrong file and your pages will take ages to load.
Most images are either going to be .jpg or .png.
JPEGs use a lossy compression algorithm which can reduce image size significantly.
PNG, on the other hand, retains the original image information. That makes PNG files larger but 100% crisp. It’s also worth noting that .png files can save “blank canvas” space, so for logos and the like, it will be your go to.
The JPEG format is best for all images of photographs where the variation in color and intensity is smooth. For example, you want to use JPEG files as feature images.
As we mentioned however, .png is best for creative assets like logos, and screenshots with precise information like text.
2. Reduce file sizes with compression
Picking the right format is not the only thing you can do to speed up your pages.
Google’s image optimization guide encourages sites owners to experiment with reducing file size as well (without sacrificing the image quality).
Here is an excerpt from Google’s guide:
“…don’t be afraid to dial down the “quality” settings, the results are often very good and byte savings are significant.”
But which tools do you need to do that?
Well, if you have Photoshop, you can reduce file size using the “Save for web” command. You’ll want to adjust the file size to be the lowest possible without compromising much on quality.
If you don’t have Photoshop, there are other online tools available. Joshua Hardwick from Ahrefs did a little experiment to understand how these popular tools fare in terms of image size reduction. Here is what he found:
- ImageOptim: JPEG reduction 69%, PNG reduction 40%
- Shortpixel: 42% for JPEG, 59% for PNG
- Kraken.io: 13% JPEG, 63% PNG.
- TinyPNG: 27% JPEG, 65% PNG
- Optimizilla: 27% JPEG, 60% PNG
- Imagify.io: 6% JPEG, 1% PNG
- Compressor.io: 42% JPEG, 58% PNG
Clearly, ImageOptim is the best for JPEG file reduction. This, however, isn’t a free tool. If you are on a budget, feel free to use any free tools listed above.
Additionally, if you’re using WordPress, there are a number of great plugins you can use to reduce your image size.
We like both EWWW Image Optimizer and Smush.
3. Include keywords in the actual image file name
When you snap a photo using your camera, it comes with a file name that has a string of letters and numbers, right?
That kind of file name often doesn’t make any sense — neither to us, nor to Google.
Google specifically advises site owners to change file names to something that actually describes the photo. It helps the search engine to understand the subject matter and context.
Here is an excerpt from Google’s own image best practices guide:
“ ….Likewise, the filename can give Google clues about the subject matter of the image. For example, my-new-black-kitten.jpg is better than IMG00023.JPG.”
Ideally, you want to include your keywords in the file name, but don’t overdo it. And don’t forget to replace spaces with underscores. An ideal file name could be something link this:
“Corgi_playing_frisbees.jpg”.
It could take awhile to rename all the files, depending on the size of your media gallery, but changing file names is always a good idea.
Follow Image SEO Best Practices
As you might have guessed, one of the most important reasons to put in the SEO leg work on you site imagery, is that you can earn links to your images!
No matter what industry you’re in, the majority of your competitors likely aren’t investing in original, or even SEO optimized images. After all, it takes hard work!
That’s why following the tips above will help keep you ahead of your competition.
Look no further than the links you can earn to your images. They can improve your websites domain authority, generate traffic, and improve your brand’s digital footprint and exposure.
Take for example, this xkcd cartoon. It’s short and sweet. But according to an ahrefs report I took a screenshot of, it has over 6k domains linked to it.

Even if you earned only 1% of that exposure with one of your images, you’re still looking at 60 naturally earned links!
Let’s dive into how exactly you can do this.
Once you’ve checked all the boxes and optimized your image files themselves, it’s time to shift your focus onto nitty gritty image SEO.
The good news is, image SEO isn’t particularly complicated or difficult.
Nor is it significantly different from standard on-page SEO best practices.
When it comes to image SEO, you should have two main goals.
- Make the search engine understand what each image is.
- Ensure images are useful and hopefully shareable
So how do we accomplish those goals? Let’s find out.
1. Take the time to write proper captions
Marketers often write image captions 15 minutes before leaving the office. Sometimes they skip writing captions altogether.
Their loss. Captions don’t get the importance they deserve.
I once read a study (unfortunately I can’t remember where) that found removing captions from images shown to participants, reduced their ability to recall the images shown by a staggeringly high percentage.
Also, if my recollection of that statistic isn’t enough to convince you (I don’t blame you, we already covered how important attribution is), it’s important to note that Google prefers to see relevant text around an image for improved crawler image comprehension.
Long story short, write captions. Don’t force it by stuffing keywords. Always write a natural-sounding one.
2. Provide image alt text
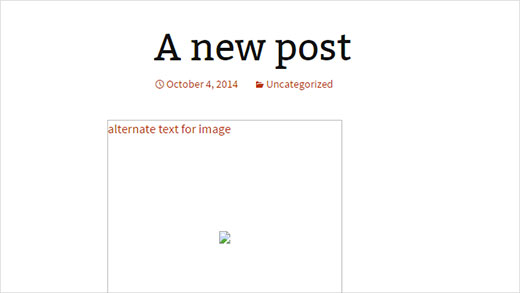
Alt text is used to literally describe an image.
Google will display alt text whenever it fails to load the actual image. See the example below.
With the advancement of Google’s machine learning, some may argue alt text is redundant now. To be honest, it’s astonishing that Google’s algorithm is so good at identifying images.
Still, it’s not perfect.
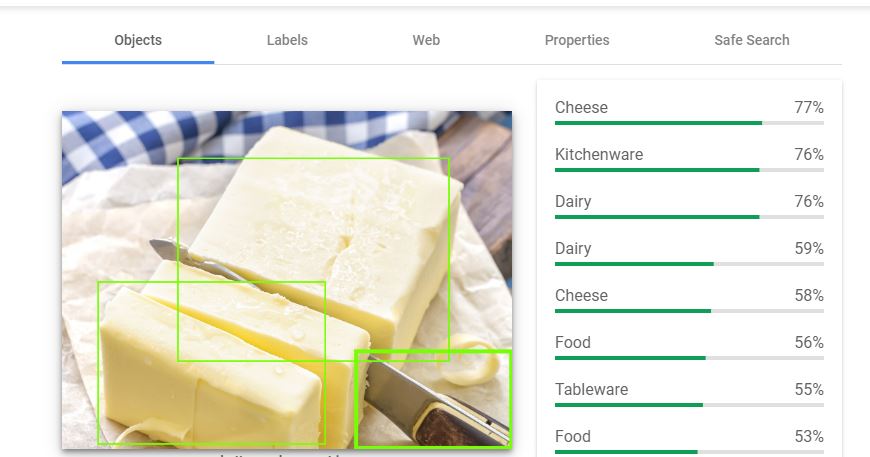
Above, is an image of butter. Google’s Cloud Vision API thinks it’s cheese.
Technology is amazing, but it’s not perfect.
You should do everything in your power to explain your image to search crawlers to improve visibility and indexation. Google explicitly asks that you do so!
Here is what Google has to say about alt text:
“…….Google uses alt text along with computer vision algorithms and the contents of the page to understand the subject matter of the image. Also, alt text in images is useful as anchor text if you decide to use an image as a link. “
There are no hard and fast rules to writing alt text. Just remember to use natural language. Here is an example for your reference:
<img src= “ apple.jpg” alt= “little girl eating apple”/>
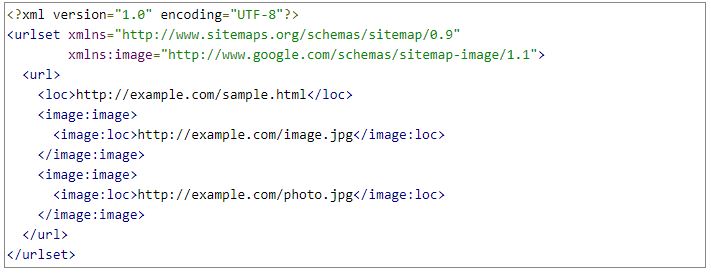
3. Use image sitemaps
Google receives image metadata through image sitemaps. This metadata helps crawlers spot images that may have otherwise been overlooked.
Please note, having a sitemap is not a direct ranking factor.
An image sitemap will just help Google to crawl your content faster and more effectively.
We recommend using an image sitemap if:
- You have a large website like an e-commerce store or blog with thousands of pages
- You update your content frequently
- You need newly added content to get indexed very quickly
Websites with a handful of pages, portfolio sites, and your average local business owner can skip this step, as these sites will likely be crawled quickly and easily by Google’s spiders anyways.
If you’re curious, here’s an example of an image sitemap:
The easiest way to set one up, is to use the Yoast SEO plugin for WordPress. Yoast, by default, will create a basic image sitemap for you.
If you’re not on WordPress, don’t worry. There are tons of tools available that can help. A quick Google search like “image sitemaps for {{CMS}}” should do the trick.
4. Leverage browser caching:
Warning: caching is technical in nature, and you’ll need a webmaster/developer to help you with this.
You can try going it alone, but we’d strongly advise against it. There are all kinds of issues that can arise from even the best intentioned efforts towards employing content caching.
What is browser caching? Simply put, it’s a way to save a copy of your site content on the visitor’s browser. It thus dramatically cuts down page load-times for repeat visits.
For example, if you are visiting this post for the first time, your browser has to download everything. Since we use browser caching, your browser will retain a lot of this data.
Next time, when you revisit this page, it will load faster than the first time.
So how can you utilize browser caching?
Again, if you’re using WordPress, you’ll have a fairly easy go of it. There are a handful of great plugins available.
We recommend W3 Total Cache, Autoptimize, or WP Rocket.
However, on other platforms, you may need to do it manually. If you’re feeling adventurous, and want to get your hands dirty, you can try adding code like the following to your .htaccess file.
You could ask your developer to add this code to your .htaccess file:
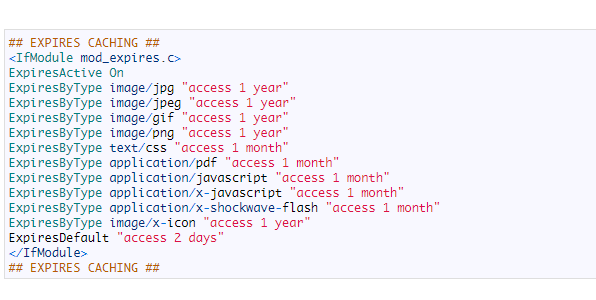
You’d just want to change “1 year” to “1 month”, “1 day”, or anything you think would work best. And of course, you’ll need to replace the placeholder names with actual files and applications.
5. Consider lazy loading
Whether or not you’ve optimized your image file sizes, leveraged compression, and turned on content caching, image-heavy pages are still going to take some time to load.
But what if you could load text and just some images first? That way you’d be able to show enough to grab and engage visitors immediately, and then load the rest of the images while they’re looking at the top of the page?
Well, luckily you can. This is done through “lazy loading”.
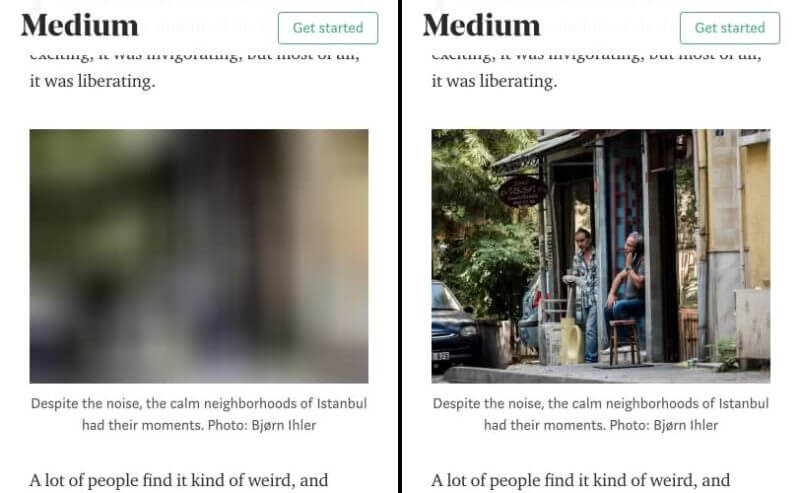
Lazy loading is where the browser is instructed to load images above the fold first. Other images are loaded afterwards.
Here is an example from Medium. I fast scrolled down the content, and you can see one of the images is still loading. But if I had been reading the content above (rather than fast scrolling through it) it would have been loaded by the time I reached it.
Recently, Google published an article revealing how to get your lazy-loaded content indexed and ranked in Google image search result.
But how do you get started with lazy loading?
Well, there are few ways to do that. You need to make changes to your code. Here are two excellent resources, one from Sitepoint and another from Imagekit for your reference.
As you’ve likely come to expect, WordPress users have the luxury of just installing a plugin.
6. Think carefully before altering live image URLs
Are you feeling the urge to open your media gallery right now and fix the things you could have done better?
Good for you! But remember, it may be best if you don’t alter the actual image URLs.
It will depend on your circumstances of course. But if you alter the URL, you’ll be starting from scratch.
It may be that some of your images are already ranking somewhere in the image search results, and you’d be tossing that out the window if you change the URL.
The reason for that is, Google will treat any image as a new one if there is any change in the URL. And don’t forget, images get crawled less frequently, so it could be a while before the new image overtakes the rankings that your previous images had.
Don’t just take my word for it. In a recent Hangout, Google’s John Muller uttered an emphatic “yes” when someone asked if a new image URL would start that image’s ranking relevance from scratch.
If you truly want to change URLs anyways, you can always use redirects. But that of course takes more time and energy. So choose wisely.
Conclusion
Hopefully after reading this article, you have a firm understanding of why image SEO is so useful and important.
Let’s recap how you can capitalize on this opportunity.
When it comes down to it, image SEO is really about 3 simple things.
- Picking the right images
- Optimizing those image files
- Getting technical with best practices
Hopefully you feel equipped to get your feet wet, but don’t forget to reach out to us if you’d like us to help you accomplish your digital marketing goals.